Integrate Biometric Attendance Device with ERPNext
Setup the Biometric Attendance Device with Frappe ERPNext for Auto Attendance based on Employee check-in and check-out logs.

While the official Frappe docs already cover the basics here, I wanted to share my hands-on experience on how I integrated Frappe ERPNext to a physical biometric attendance and access control terminal/ device and setup the Auto Attendance feature based on Employee Check-In and Check-Out logs.
There are 3 methods to push biometric punch logs into Employee Checkin module of ERPNext.
- Manually import punch logs as Excel/ CSV files using Data Import Tool.
- Automate the sync of punch logs to integrate with HRMS API endpoint using API secrets.
- Set up a Python script running as a background process to fetch punch logs from a biometric device and push them to the HRMS API at specified intervals.
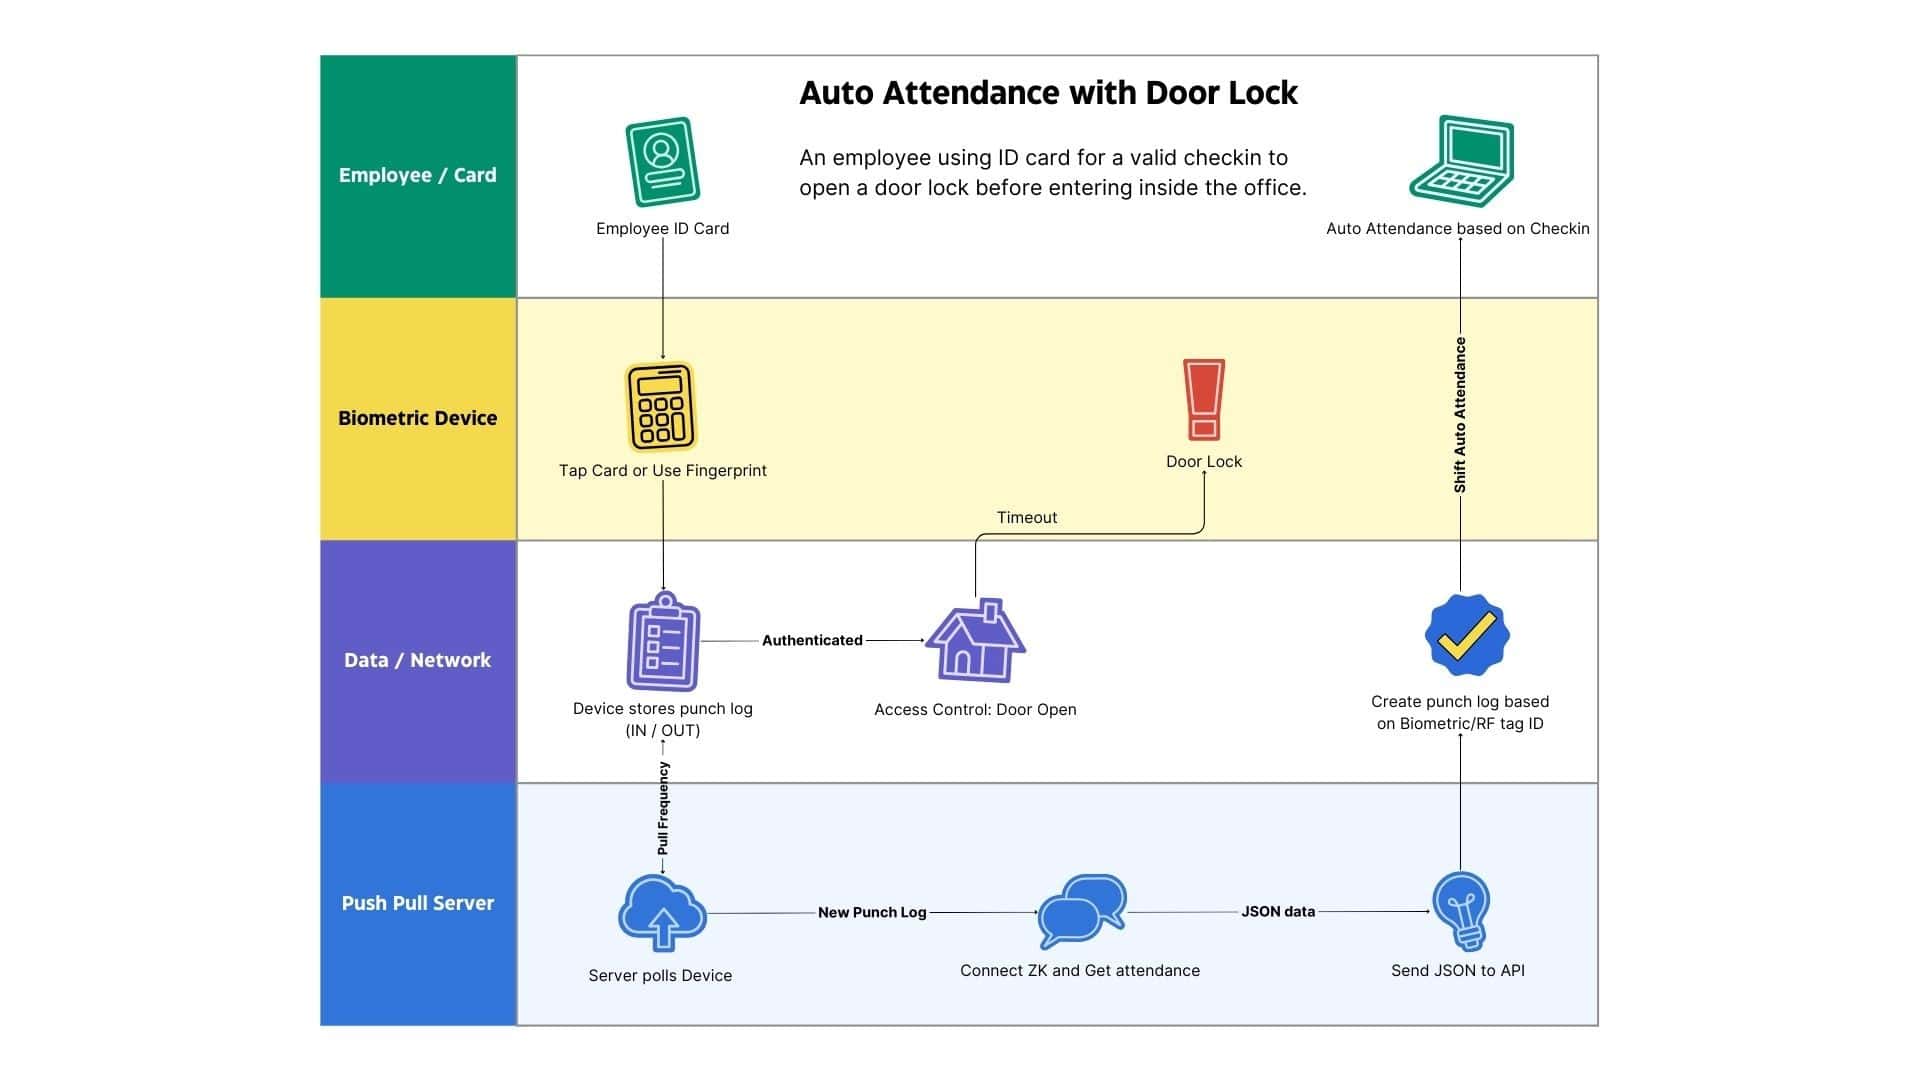
Here, we're going to combine step 2 and step 3. And, guide you on how to setup Door Lock Access Control with an electronic RIM lock.

In this article, I’ll walk you through integrating Frappe HRMS with biometric attendance devices (BAS), share how I automated the runtime using nohup and Linux cron jobs (daemon process) to monitor real-time outages when the device goes offline, with webhook notifications sent to MS Teams.
If you find any details missing or exaggerated then please comment down. This is a spur-of-the-moment write-up and I'm just writing on a whim. I hope it saves you time.
I've utilized these 2 Github repositories which will be vital throughout this article. A BIG shoutout to the amazing contributors who have already solved the complex problems for the rest of us.
- https://github.com/fananimi/pyzk - Unofficial library of ZkTeco fingerprint attendance machine. We'll use it to ping the device from the server.
- https://github.com/frappe/biometric-attendance-sync-tool - Python Scripts to poll your biometric attendance system (BAS) for logs and sync with your ERPNext instance
Things you must need:
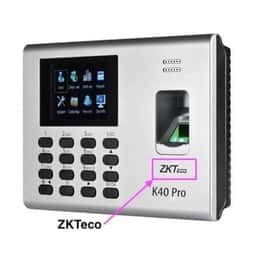
- Attendance Device with ZkTeco protocol. A K40 model for example.

- An RJ45 Cat 6 wire to connect the attendance device to the server.
- A tiny Linux Server with basic memory should suffice.
- An ERPNext User account for the API Key and API Secret.
User Permissions you will require:
- An SSH user access on the server.
sudois not required. Adminprivilege user on the attendance device. Only Admins can open the Main Menu to view and edit the Ethernet PC Connection in the device.System Managerprivilege to create a new User in your ERPNext instance.
Things you must verify:
- Verify a successful wired Ethernet connection between the biometric device and the server.
pyzkcan ping your attendance device successfully with the details.
$ python3 test_machine.py -a 192.168.123.456 should display the device details.
This should confirm that your attendance device:
- has an Ethernet connection with an IP. For eg:
192.168.123.456 - is ready to communicate with the server, which will pull and push data later on.
How does this all work?
- You save your preferred configs in
local_config.py. erpnext_syn.pywill pull data from a biometric device through an IP.erpnext_sync.pywill push data to your ERPNext instance through the HRMS API endpoint.- Poll the biometric device for data within a specified interval.
Attendance Device Terminal:
A successful wired connection (Ethernet) from the server to the device will provide a static IP to the attendance device. Once the IP is set and the connection is active, you should see the Network icon visible at the right top of your device screen.
Setting dynamic IP to the device in DHCP mode works too. However, choosing DHCP would mean any restart could automatically reassign a different IP. And you would need to edit the local_config.py file with every new IP which could be a hassle. I leave the decision to you.
- open Main Menu > Add User.
- Fill in sample details. The only important data point is the User ID.
This User ID must match with the Attendance/ Biometric ID in ERPNext Employee Doctype. For eg: if John Doe is set with 977 then you need to set 977 in the attendance device User ID for John. Hence, each employee must have a unique Biometric ID throughout both systems.
Network Settings > PC Connection.
You can set any integer value to Device ID. This must also be set in the local config py file later on.
Similarly, the Comm Key must always be set to 0
ERPNext Instance - (yourERPdomain.com)
On the ERPNext instance, you need to create a new User account that will act as a bot account whose sole purpose will be to create check-in logs. This user account will maintain the logs so it's better to configure minimal permissions required and keep this account protected to prevent tampering with check-in logs if used in any organization. You can also use any real person's ERP account for instance your HR Admin.
Only the System Manager can add a new user in ERPNext. More in detail.
Once the new user account is created, in the Role Profile, set HR Manager for this user. By default, only users with HR Manager permissions can create new employee check-ins. However, consult your ERPNext Admin for clarity.
Navigate to Settings >> API Access and generate an API Key and API Secret. Keep it secure and safe.
Set a unique Biometric ID for any employee to test the check-in logs. However, this employee data must match with attendance device ID.
To identify as an authenticated user allowed to create employee check-ins, the Python script will use the generated API Key and API Secrets of this user from the local_config.py file.
SSH into Server
- ssh into the server
sudo apt update && sudo apt upgradegit clonehttps://github.com/frappe/biometric-attendance-sync-tool.git- install python3 with pip included.
- activate python Venv environment
- pip install -r requirements.txt
- pip install pyzk
- edit details for
local_config.py - run the
erpnext_sync.py - use
&to run Python script in the background. usenohupto ignore hangup signals. - check logs/ folder
$ ssh [email protected]
git clone github repo
cd into the repo
install python3 and pip3
source venv/bin/activate
pip install -r requirements.txtpython3 erpnext_sync.py &Valid Parameters expected:
employee_field_value: Attendance Device ID found in your biometric logs and set in the Employee record in your ERPNext instance.timestamp: The timestamp of the Log. Currently expected in the following format as a string:2024-12-01 10:05:01.000000device_id: (optional) Location / Device ID. Set0or1in BAS. Usually only supports integers.log_type: (optional) SetAuto. Maps to the'punch_direction': Auto,inside of yourlocal_config.pyemployee_fieldname: (Default:attendance_device_id) Name of the field in Employee DocType based on which employee lookup will happen.
A sample of the valid Log Data that the script will POST to the API endpoint:
yourcompany.com/api/method/hrms.hr.doctype.employee_checkin.employee_checkin.add_log_based_on_employee_fieldERPNext API endpoint that receives the log
{
    'employee_field_value' : employee_field_value,
    'timestamp' : timestamp.__str__(),
    'device_id' : device_id,
    'log_type' : log_type
}
sample Log that is sent to the ERPNext API
Primarily, we only need 2 files from the Github repo:
erpnext_sync.py- the main Python script that does all the worklocal_config.py.template- A Python config file is required forerpnext_sync.pyto operate. It holds the configs like
Make a copy of it for backup. And rename fromlocal_config.py.templatetolocal_config.py
# ERPNext related configs
ERPNEXT_API_KEY = 'api key of ERP user'
ERPNEXT_API_SECRET = 'api secret of the same ERP user'
ERPNEXT_URL = 'http://yourdomain.com'
ERPNEXT_VERSION = 14


# operational configs
PULL_FREQUENCY = 1 # in minutes
LOGS_DIRECTORY = 'logs' # logs of this script is stored in this directory
IMPORT_START_DATE = 20241201 # format: '20190501'

devices = [
    {'device_id':'1','ip':'192.168.123.456', 'punch_direction': Auto, 'clear_from_device_on_fetch': False}
]

shift_type_device_mapping = [
    {'shift_type_name': ['Shift Name in ERP'], 'related_device_id': ['1']}
]
Solution to common issues/ errors
- Unauthenticated issue
Always set the Comm Key to 0 (zero). It's default.
2. PyQT5 wheel build error
For some deprecated reason, you could get a "PyQT5 wheel build error".
To solve it, install first:
pip install "PyQt5-sip==12.7.0"
and then:
pip install "PyQt5==5.13.1"
3. Device Fetch Failed
Ensure your Device ID is set to any number like 0 or 1.
And validate the same number is set in
{'device_id': '1', ...}
{'related_device_id': '1'}
in your local_config.py file.
If you are using 2 or more devices at once, the Device ID must be unique to identify.
Additional TODOs:
Geolocation Tracking
You can also track geolocation in employee check-ins. To enable this, go to HR Settings and enable "Allow Geolocation Tracking"