Install ERPNext with Docker Tutorial - macOS
A Step-by-Step Guide on how to install Frappe ERPNext in macOS using Docker for arm64 based arch viz. M1, M2 chips.
A short Step-by-Step Guide on how to install Frappe ERPNext in macOS using Docker for arm64 based architecture viz. Apple M1, M2 chips.
Given that you know Git and macOS, installing ERPNext via Docker is easy and simple.
💡
Frappe Docker Github: https://github.com/frappe/frappe_docker
Step 1: Git Clone frappe_docker in local folder
git clone https://github.com/frappe/frappe_docker.git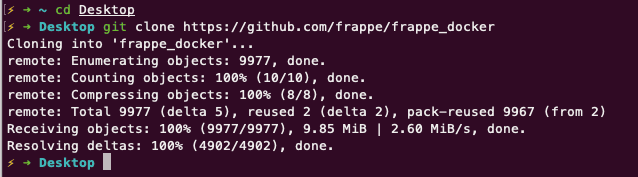
Change directory into the frappe_docker
cd frappe_docker
Step 2: Docker Build multi-arch images for arm64
docker buildx bake --no-cache --set "*.platform=linux/arm64"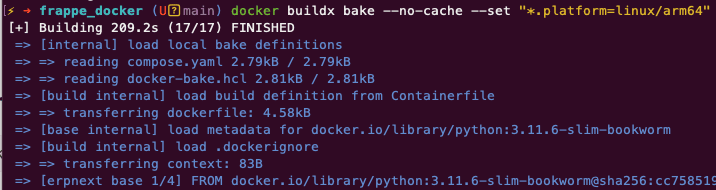
Step 3: Edit pwd.yml with platform versions
- add
platform: linux/arm64to all services in thepwd.yml - replace the current specified versions of ERPNext image with
:latest
We do both using default sed command available in zsh terminal of macOS.
sed -i '' '/image:/ {
s|frappe/erpnext:[^ ]*|frappe/erpnext:latest|g
N
s/\(image:.*\)\n\( *networks:\)/\1\n    platform: linux\/arm64\n\2/
}' pwd.yml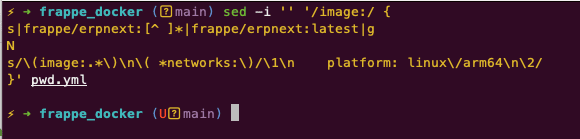
Before:
  backend:
    image: frappe/erpnext:v15.50.0
    networks:
      - frappe_network
After using sed in pwd.yml:
  backend:
    image: frappe/erpnext:latest
    platform: linux/arm64
    networks:
      - frappe_network
💡
Add edits to all services from backend to websocket.
Use sed or awk. Instead, you can edit pwd.yml manually in any text editor.
Step 4: Docker Compose Up with pwd.yml
docker compose -f pwd.yml up -d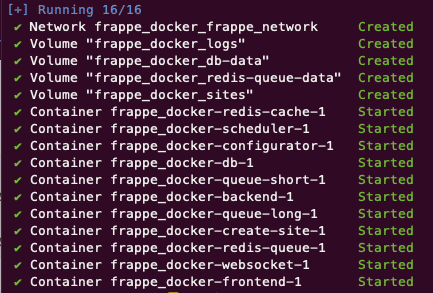
Optional: Check docker logs for create-site service
docker logs frappe_docker-create-site-1 -f
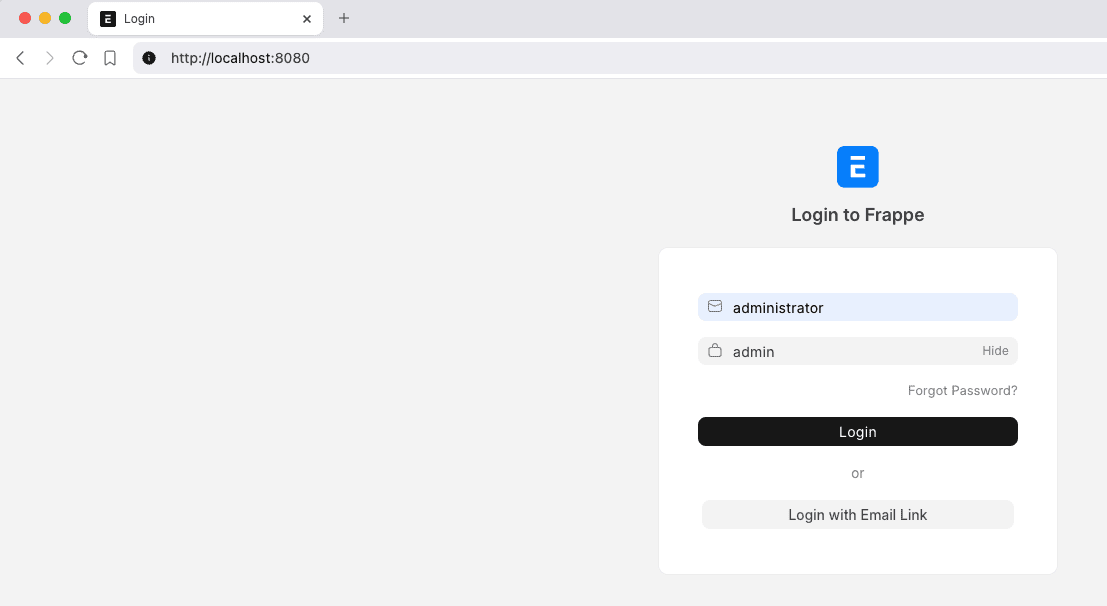
Step 5: Open browser and goto localhost:8080
Great, your locally running ERPNext is ready on http://localhost:8080
By default, it uses administrator and admin as credentials.
Cloud Service Providers for your ERPNext in Production: