
Setup Mailgun with Ghost in Cloudron - Send Email Newsletter
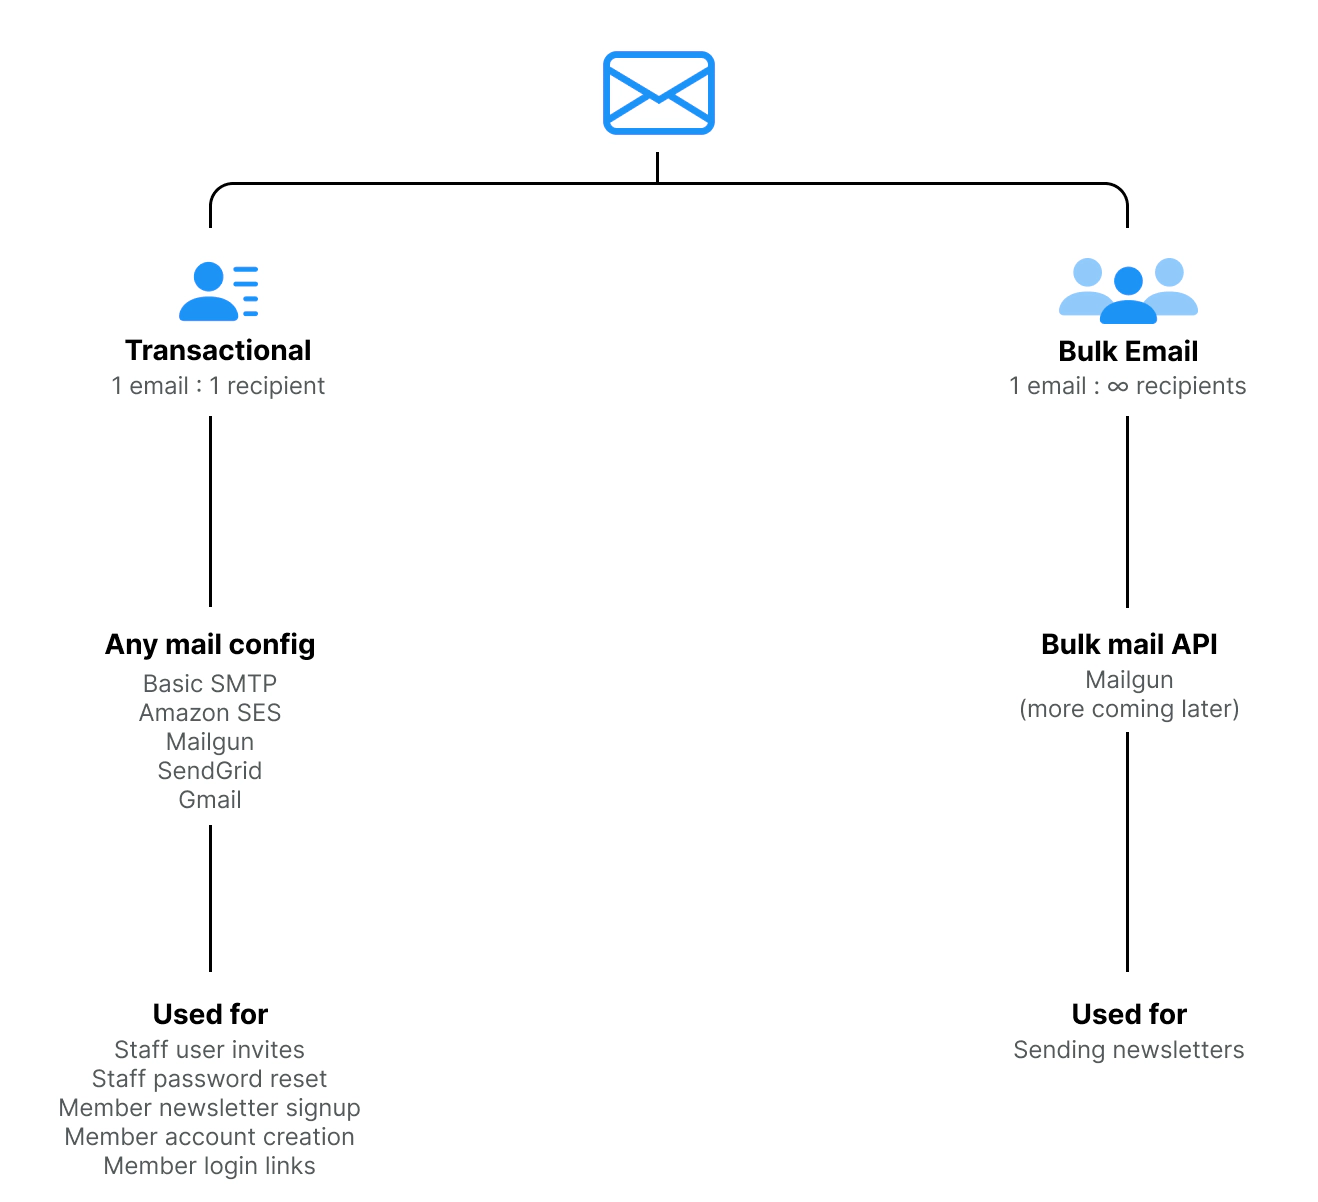
Ghost sends two types of emails:
- Transactional emails - for password reset, member sign up confirmation, invites etc.
- Bulk emails - for newsletters. This requires Mailgun or any bulk mail API. Ghost doesn't allow basic SMTP to send bulk emails.
To setup Mailgun with self-hosted Ghost instance that runs in a Cloudron is a bit tricky but interesting. Let's dive into it.
Assuming you already have a running instance of Ghost in Cloudron. For example: https://blog.example.com/
Step 1: Sign up for Mailgun account and verify your email address.
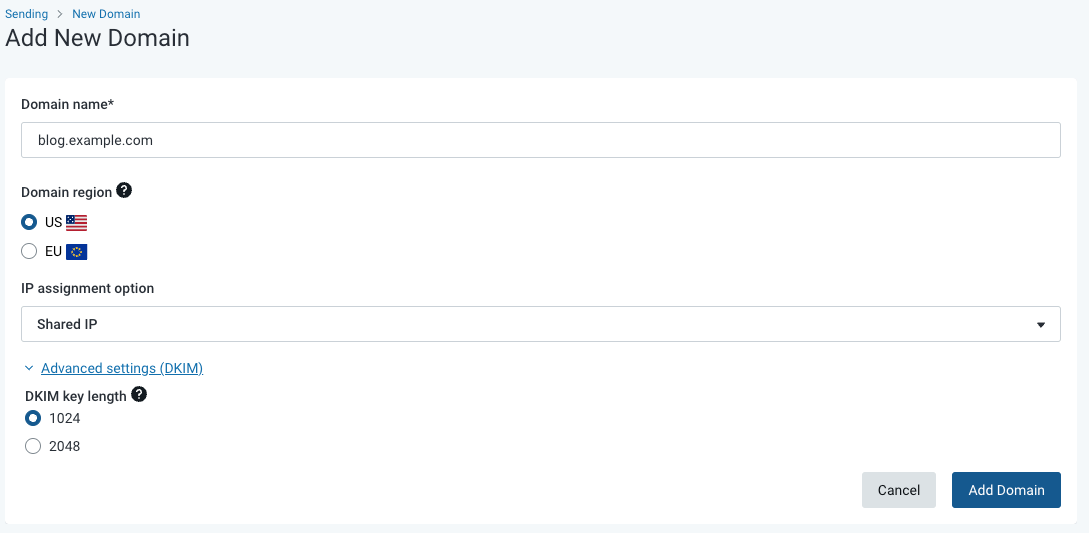
Step 2: Navigate to Sending > Domains and click Add new domain
Note: Sandboxed domains cannot be deleted and are not useful in this process. They may look like sandbox1234560b1123456f8f46eb7ajsdn1234.mailgun.org Ignore sandbox domains by Mailgun.
Note: If you use cPanel to manage your zone redirects like A, CNAME, TXT records then using 1024 DKIM key length is better to choose. 2048 DKIM Key length is truncated by cPanel when adding a TXT record. So, if you choose stronger 2048 DKIM key length then you just need to make sure to click + to Add TXT string to record to paste the remaining part to complete it.
Step 3: Add DNS records to your hosting provider and Verify DNS Settings.
After you add new domain, you are provided with DNS records to setup. Use this step-by-step guide from Mailgun to add DNS records and verify your domain.
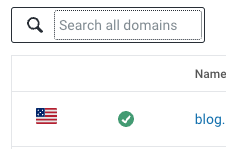
Once you setup DNS records, you will receive an email from Mailgun that your domain is verified. After the email, your new domain status should change to green like in the image below.
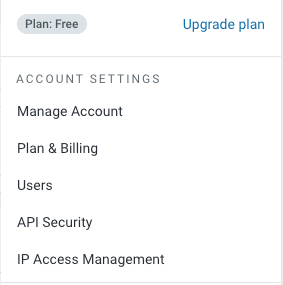
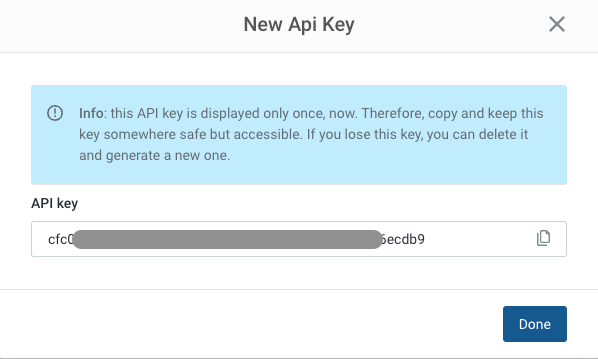
Step 4: Navigate to API Security from your Account Settings and create a new Mailgun API Key.
Find Mailgun API keys and Add new key. Give it any name and make sure to copy this API key in a safe way temporarily.
Step 5: Enable Email newsletter sending in your Ghost settings and paste Mailgun domain and API key
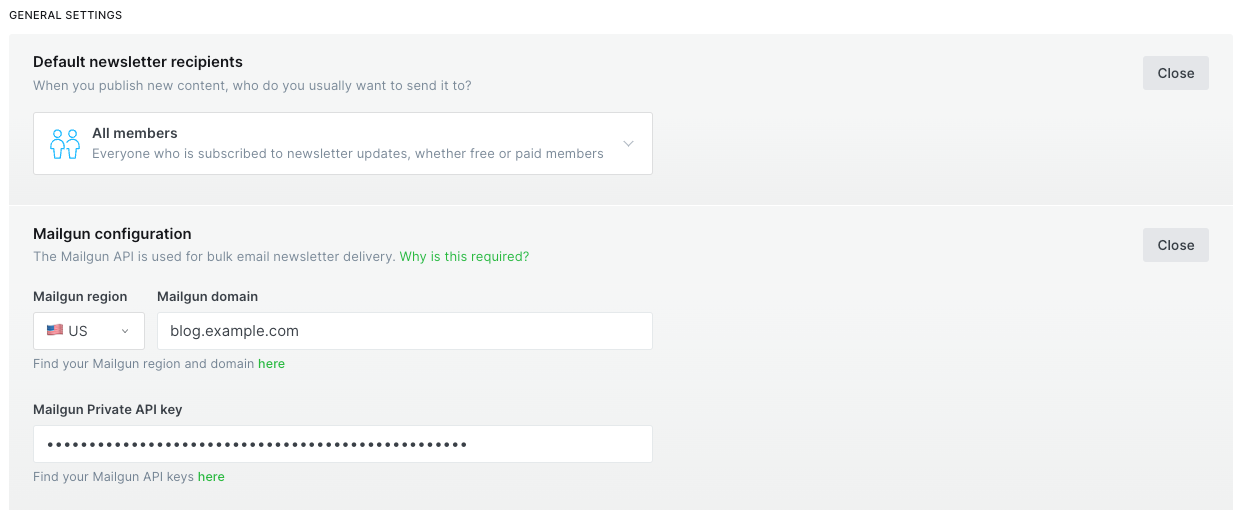
Mailgun domain is exactly your new domain that you added and verified in Mailgun at Step 2 previously. For example, blog.example.com
Mailgun Private API key is your copied API key from Step 4 above. Paste it exactly without any whitespaces.
Step 6: Add new SMTP user from SMTP credentials in Mailgun Domain settings.
Navigate to Domain settings > SMTP credentials and ensure your domain is selected in the dropdown.
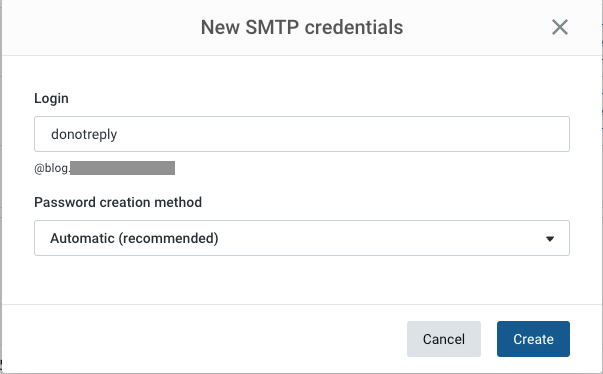
Add new SMTP user. Give it a unique Login name. This will be your username@domain.com. For example, if you name it noreply then your emails will be sent from noreply@blog.example.com. So, yea name it something nice that your users will see at their email headers from.
Step 7: Add credentials to your config.production.json and disable Cloudron app's mail delivery settings
You should be an authenticated user with admin privileges to access Cloudron App Settings like Logs, Terminal and File Manager of Ghost app.
Navigate to your Ghost app in the Cloudron and open its File Manager. You can find config.production.json file right at root directory.
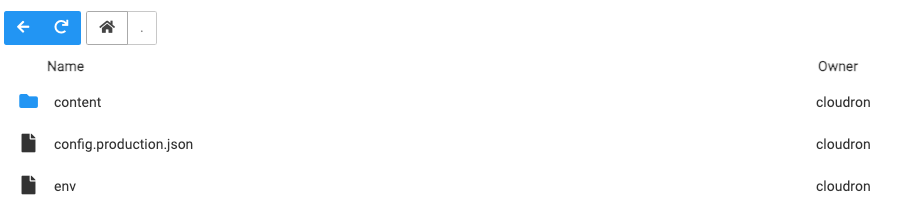
Edit the config.production.json file and add the following credentials:
"mail": {
  "transport": "SMTP",
  "options": {
    "service": "Mailgun",
    "host": "smtp.mailgun.org",
    "port": 465,
    "secure": true,
    "auth": {
      "user": "something@blog.example.com",
      "pass": "your-copied-password"
    }
  }
},
Replace values of keys "user" and "pass" with your Mailgun's SMTP user email and password created in Step 6 above.
If you are already using another "mail" config then you need to replace it with Mailgun. A duplicate "mail" config cannot exists in the same json file.
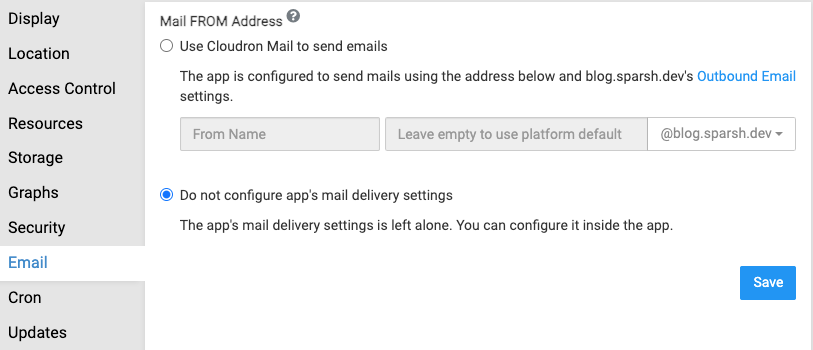
Navigate to your Ghost app settings in Cloudron > Email and set it to Do not configure app's mail delivery settings as shown in the image. Save it.
Usually this setting overrides the config.production.json file so everytime you save changes and ghost restart, the saved configs are lost. This could make it funny and tiring so always remember to set app's mail delivery to be left alone.
Congrats! 👏 You are almost done. Verify all saved changes and steps.
Navigate to your Ghost app settings Repair > Restart App to restart your Ghost app. Once the app restarts successfully, test your setup by signing up or sending newsletters.
Common issue: Mailgun Tracking hostname email HTTPS invalid link
If your click button on the email is having a SSL invalid error with suspicious website warning then you need to turn off the Open tracking in Domain settings in Mailgun. See the image below for details:
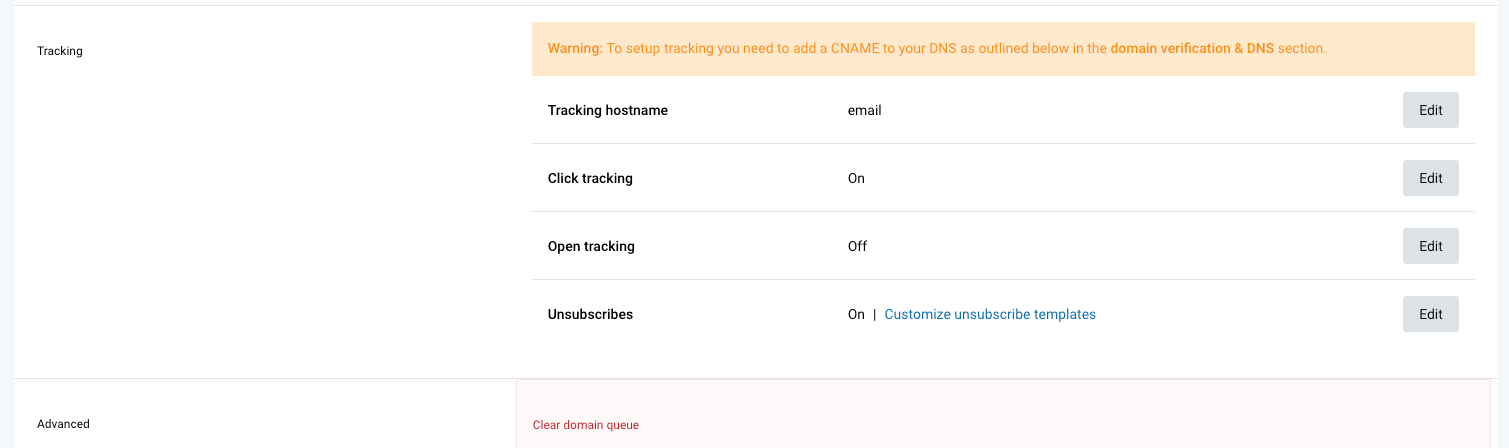
During DNS records setup, you are asked to add CNAME record to default email.domain.example.com. Later, it expects to match the default email Tracking hostname in Domain settings. This is a feature to track whether your bulk emails have been opened by your users or not. However, the email.domain.example.com redirects to HTTP because Mailgun do not support HTTPS to mailgun.org. So when a user clicks the button on email it redirects to invalid link and marked as suspicious by browsers. As of this writing, HTTPS tracking links are only available for paid plans in Mailgun. So it is better to turn off this one feature at all and skip all the hassle of suspicious links from browsers.
Read more from Mailgun on it here: https://help.mailgun.com/hc/en-us/articles/360011566033-How-to-Enable-HTTPS-Tracking-Links